In this video, I provide a simple guide to running the Start9 operating system on a cheap Mini PC as a dedicated, self-hosted server for running Bitcoin Knots and other services. The information presented is meant to improve on Bitcoin Not Crypto’s video $300 DIY Mini PC Bitcoin Node | How to install StartOS.
This video addresses the storage space limitation of the DreamQuest N150 variant referenced in the above video. The setup presented here doubles the storage to 2TB while remaining within the $300 price range, and simple enough for practicaly anyone to set up.
I believe I bought one of the A-Tech RAM models that do not work. I came here to look into the swap mentioned in the description of the video. Any information on that would be appreciated.
Cool. I’ve got some OWC sticks on order that will work, so I’ll send you one of those. They should arrive here in a week. I sent you a DM where you can share your shipping address with me directly.
I wanted to start by saying great tutorial. However I have run into an issue. I bought a refurbished HP elitedesk 800 G2 mini as it was an affordable option on Ebay. It came with 32 gigs of RAM which was great, but only a 500gig SATA ssd (with windows 11 preinstalled). I bought a 2 TB m2 nvme ssd and installed it, but now the PC wont show up on the start.local page. However when i put in the old SATA ssd, it does show up and i am not sure why. How can I troubleshoot?
Do you have a keyboard, mouse, and monitor you can borrow and hook up to it? That would be the easiest way to troubleshoot.
At which point did start.local stop being reachable? Was it after installing StartOS when it asks to reboot, or was it before that when you tried the initial boot?
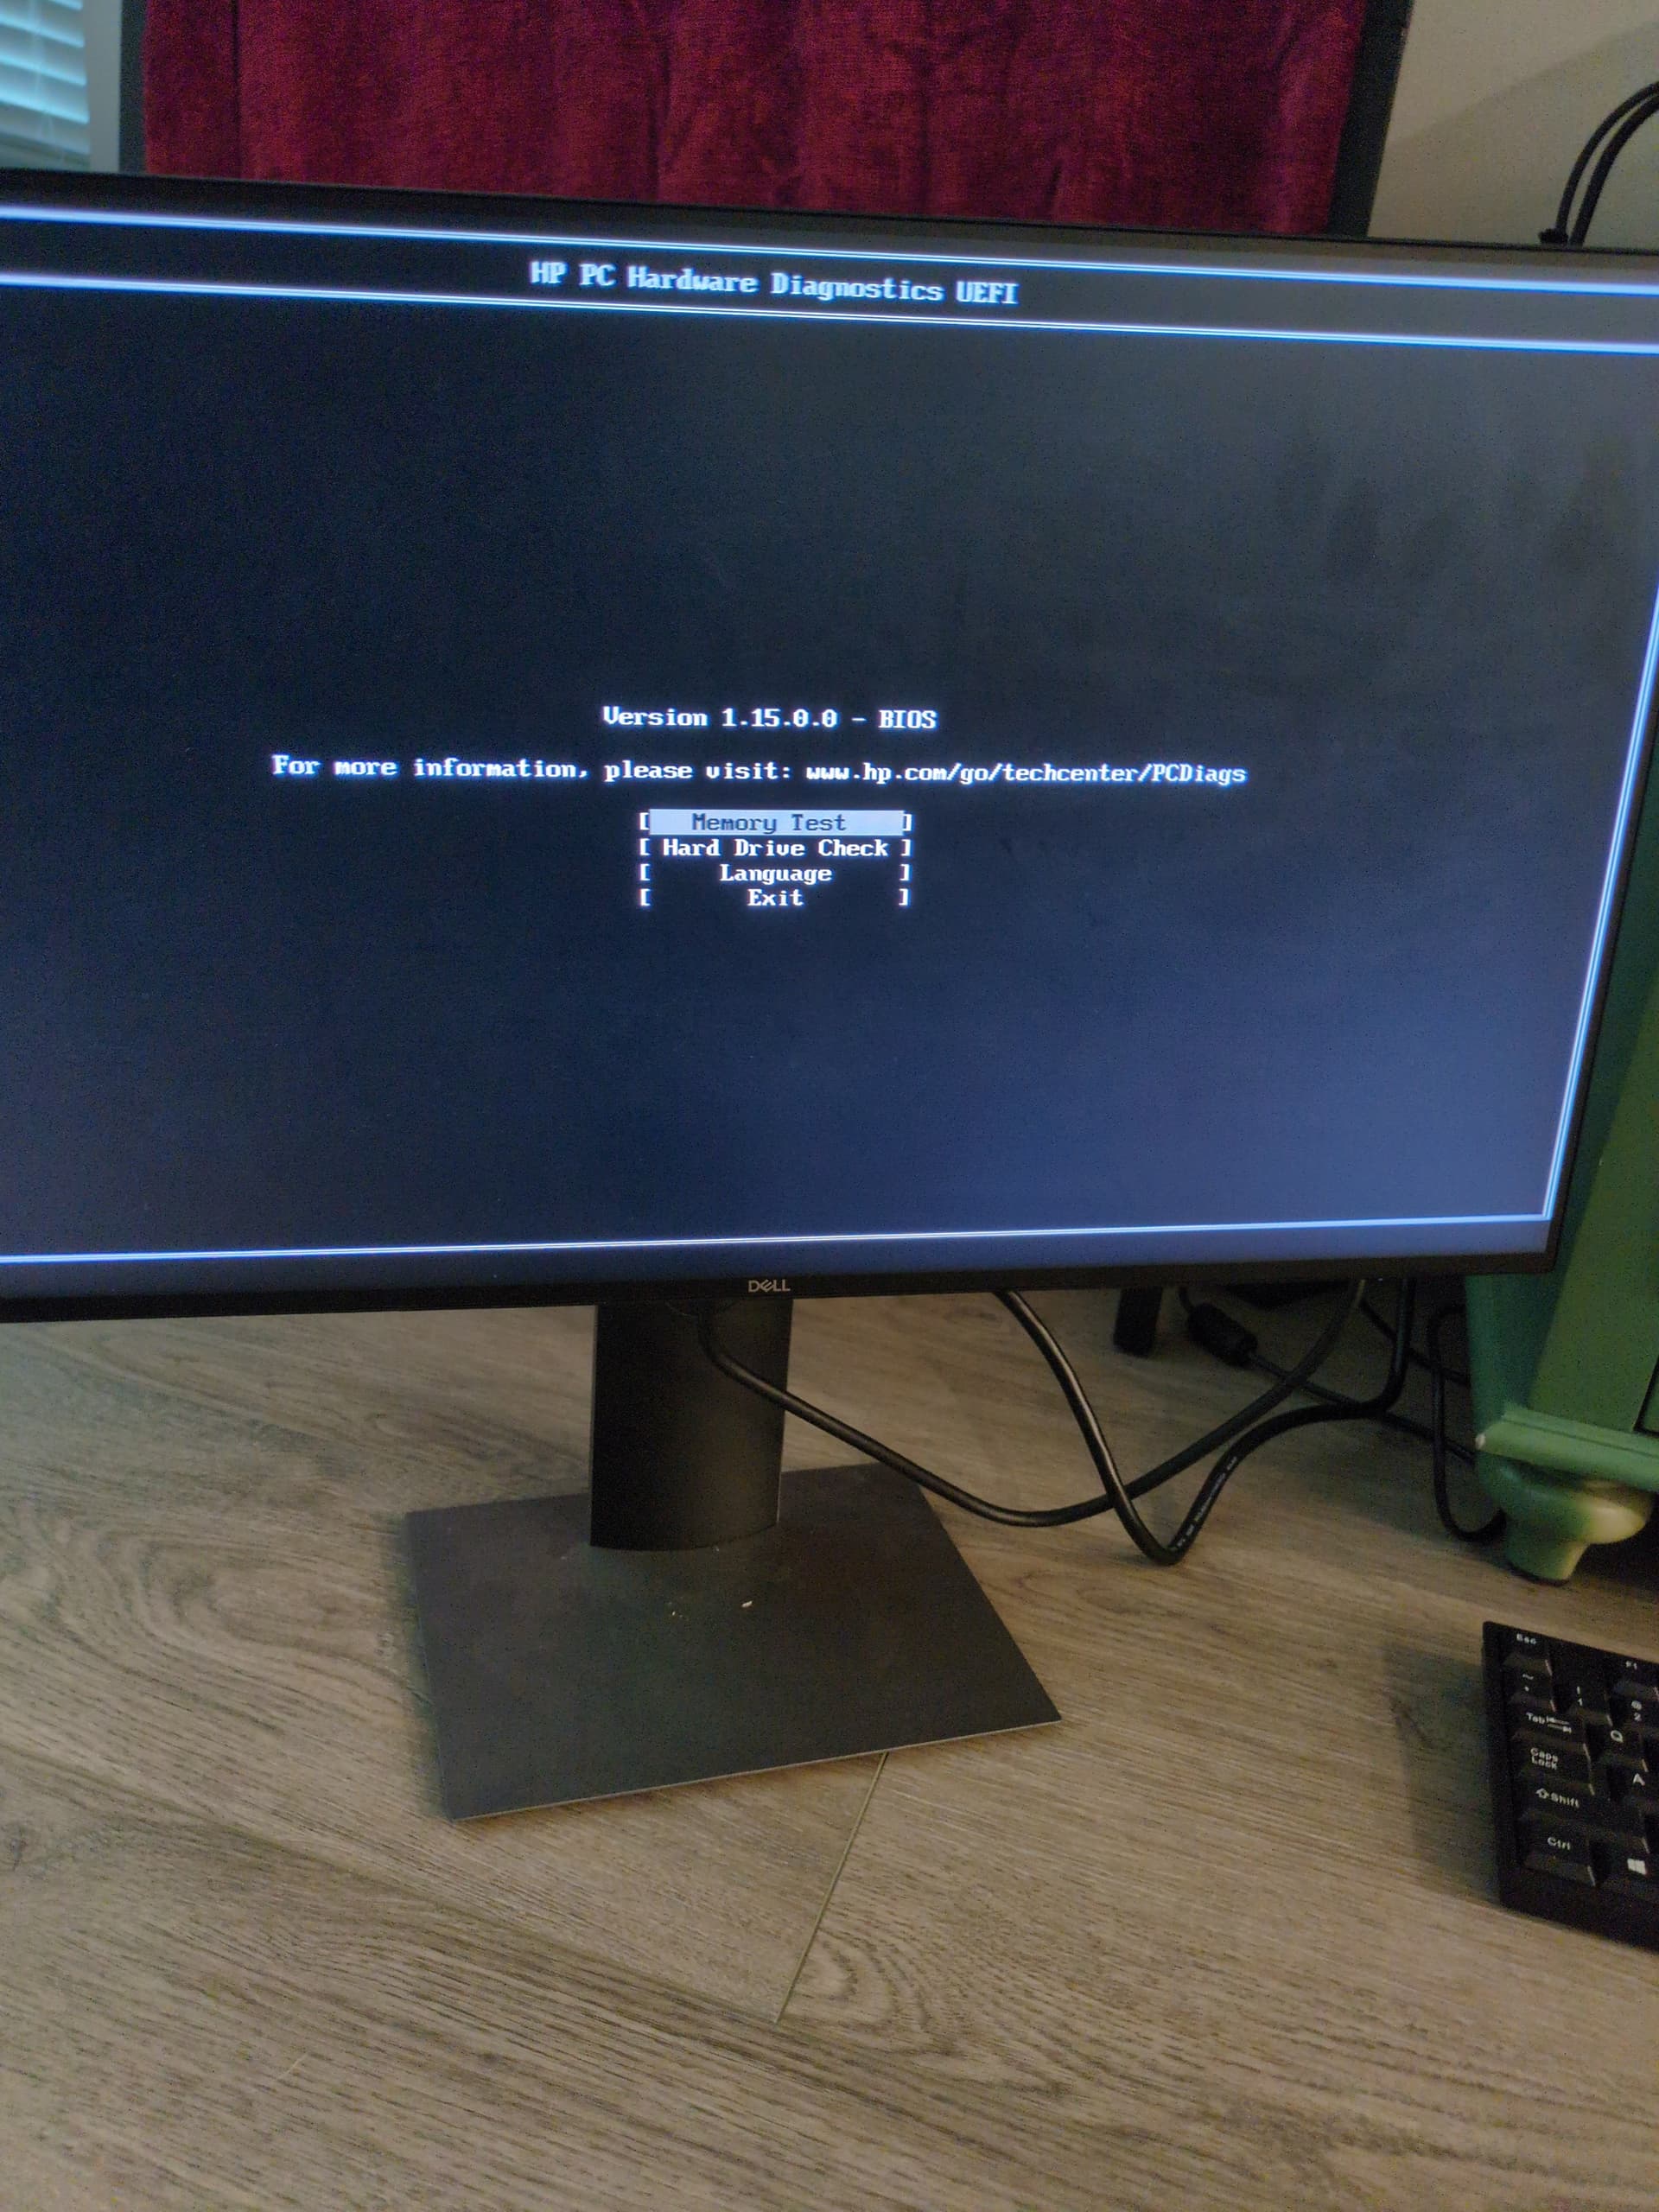
It was before the initial boot. I obtained a monitor and and peripherals. To be clear, I tested if it would work with the original SATA SSD (that was installed with windows 11) and the start.local page loaded fine. However, with the new M2 NVME drive, the page does not load. In fact the device doesn’t even show up on the router as a connected device. However, it DOES get detected (as a wired connection) with the old SATA SSD. Booting up the device with the new drive shows the BIOS screen (attached).
To be clear, this is while the flashed USB drive is inserted. When using the old drive, the flashed USB was detected and the flashed USB brought up the start.local page just fine.
That is indeed strange. Looking at the specs for the HP Elitedesk 800 G2 mini, NVMe is supported. Prior to that screen loading, do you see any options to either get into BIOS settings or for a boot menu? From the screen shown, the only thing that looks potentially useful is Hard Drive Check. Anything useful show up if you run that?
I took a break from troubleshooting for a few hours and left the computer off. After a while it turned and started working as normal and the start.local page showed up automatically. I did nothing, it just fixed itself. No idea how. But thank you!
Given the RAM and SSD prices currently (which are going to dominate the price you have to pay to build a server, regardless of what system you put them in), I suppose it depends on how comfortable you are with DIY.
There are not many inexpensive miniPCs which are as easy to work on as the G3, so if simplicity is important to you, then probably going with G3’s big sister, the G3 Plus is the least expensive option (though it too is sold out in barebones, so least expensive path would be the 16+512 variant and replace the SSD). Note that this build would run you around $580 (G3 Plus: $300 + Jupiter NVMe: $280)
This is of course well over the $275 in my video, but keep in mind that even what I showed in the video has, since the RAM and SSD price crisis, gone up drastically. That same build today would cost $550 (G3 Barebones: $120, compatible RAM: $150, Jupiter NVMe: $280), so the G3 Plus route is actually ony $30 more expensive in today’s market.
Which, in perspective, means that DIY is no longer the best alternative for those who aren’t as tenchnically savy or willing to take some risks to try “thinking way outside of the box” builds. The Server One (same specs – 16Gb RAM and 2TB SSD) on the Start9 store is $622.11 (just a little over $70 more than what the DIY build I showed in the video would cost you in today’s market)
If you are comfortable with DIY work on small electronic devices like this, I can point you to some cheaper alternatives, but they are not nearly as simple as what I showed in the video (and certainly not for everyone).
Just to give you an example of a slightly more technical build that would save on cost – one could take the Dreamquest N95 16+512 variant for around $210. This model has a second NVMe expansion slot, which you could populate with a 1TB gen3 NVMe for around $145. Then, rather than installing StartOS directly, install ProxMox on the device, reserve 2GB RAM for ProxMox, create a single 1.5 TB drive over both NVMes using LVM, and then install StartOS onto that with 14GB RAM allotted to it. This build would run around $355. It would have 1.5TB of storage space with the option to expand it further by adding a SATA SSD to the LVM storage in ProxMox in the future.
But currently, the most effective way to save money on building a server during the RAM+SSD crisis is to try to side-step the problem entirely – by purchasing used devices with RAM pre-installed, going with older-gen devices that take DDR3, and using a hybrid of small SSD with swap space combined with an HDD for data storage. This is the area that I am currently exploring. There is no free lunch – you always are going to be making a trade-off within the cost / simplicity / performance trilemma.
Hi Paul, thank you for your very detailed explanation and walkthrough of how to set up a Start9 server in order to run a node. Whilst i am an electrician, i don’t do much in the way of electronics, and didn’t think building a server was something i could do until Matthew Kratter linked your video and i was amazed at how simple it was.
I suppose everyone looking to do a self build or even buy a pre made server is taking a hit financially right now as all of the components seem to have sky rocketed in price due to AI and so on. My problem is that I can’t seem to track down a GMKtec G3 N100, N150, or G3 plus barebones anywhere here in the UK. The GMKtec uk site seems to have the barebones G11 in stock at a pretty decent price and i’m wondering if you think this would be a suitable unit to use? According to AI the ram and ssd parts you linked seem to be compatible also. If i have calculated correctly these parts come in at £462 whereas the server one from start9 is around £675 plus like another £50 for shipping.
Please, if you have time to share your thoughts on updated parts and mini pc’s you may recommend it would be greatly appreciated
Based purely on the specs, it should be compatible. That one has an AMD processor instead of Intel, but StartOS supports both. That said, I have not tested on that partcular model myself, so there would be a bit of a gamble. Worst case scenario, if it isn’t compatible with StartOS, I can help you get Proxmox set up on it and run StartOS that way (or switch to Umbrel if you aren’t set on Start9).
If you want some options that folks have reported to have successfully run StartOS on, there is a thread on the community forum here. Obviously different models come with varying degrees of difficulty taking apart and reassembling to install the RAM and SSD, so before getting something see if you can find a video for the particular model on Youtube showing the process so you know what is involved.
Also note that if things don’t go smoothly for the particular model you get, you may need to have access to a keyboard, mouse, and monitor to hook up to it while troubleshooting. Whichever route you go, though, I’ll definitely try to help you out if you get stuck.
Hi Paul, thanks for getting back to me so quickly. Ah i never noticed that about the processor. Definitely worth keeping in mind.
Also, thanks for suggesting the forum, i’ll be sure to check it out.
Aye thats a good shout about the keyboard, mouse, and monitor too. I’ve only got a macbook here so not sure if that’ll help much if i need to hook up to screen while troubleshooting if i have to.
Really appreciate you offering to help me if i get stuck further down the road.
Hi Paul and community, I’m here looking for some help with setting up a nucbox G3 to run start9 and knots. I’m having a problem with the unit powering down on launch of the start9 installer, also tried to install Ubuntu and that powers the unit down at 39.4… I’m wondering if I have a faulty (hardwear) unit that’s shutting down under load? Or is there something in the bios creating the issue? Any help and advice would be greatly appreciated.
I purchased the unit second hand from eBay without an os without really thinking, needless to say I’m thinking all sorts now